Our Blog

5 Tips for Downsizing Your Home without Pulling Your Hair Out

The kids have all grown and moved into their own homes, and as you look around, you realize that there’s just too much space. You can’t help but think that now is the perfect time to pack up and move to a smaller place. Not only will it be easier to manage, but having a smaller home will cost you less to maintain, and it will give you a lot more freedom.

Despite the benefits that downsizing your home can provide, you can’t help but feel overwhelmed. You’ve amassed a lot of stuff over the years. And, you just can’t help but feel an emotional connection to the space. So, where do you begin? Here are some effective tips that will help you successfully downsize your home without pulling your hair out.

Determine What Type of Space You Want

It’s obvious that you want a smaller space to live in, but when you’re downsizing your home, there’s more to consider than just a “smaller space”. Do you want to rent or own? What type of home would you be comfortable in? Is a single-family, detached house with less square footage than your existing home what you are looking for? Would you be more comfortable in a condo or an apartment? Do you want to tend to the yard work yourself or would you rather have someone else do it for you? Are amenities something that’s important to you?

These are all questions that you need to consider when you’re downsizing. Yes, you want a smaller home, but there are so many things that you should think about before deciding what type of downsized home you want to move to. How do you know what will work for you? – That really depends on your unique interests and what you think will best suit your needs. Make a list of needs and wants and think about which option will tick off most of your boxes.

Work with a Realtor

A lot of people make the mistake of thinking that they can handle the downsizing process on their own. Sure, you might be able to do it yourself, but it’s probably going to end up giving you more stress than necessary.

When you’re downsizing, you have to sell your existing home and find a new place to live. You also have to take inventory of your belongings, determine what you’re keeping and what you’re purging, pack, and so much more! By hiring a realtor, you’ll take some of the stress off of your shoulders. A real estate professional will not only assist you with selling your home, but he or she will also help you find your new (smaller) dream home.

Take Inventory

It’s funny how much “stuff” people accumulate, especially when they live in a large space. If you’re downsizing, you aren’t going to be able to take everything in your existing home with you. From a logistical standpoint, it just isn’t going to fit. Yes, you could rent a storage unit, but do you really want to pay a monthly bill to store items that you might never end up using again?

With that said, you’re going to want to take inventory of all of your personal effects. Go through each room and decide what absolutely must go with you and what you just don’t need anymore. It can be hard to part with your belongings. To make it easier, use the “one year” rule: If you haven’t used something for more than a year, chances are you really don’t need it. This includes clothing, dishes, appliances, and furnishings.

Start Early

As soon as you list your house on the market, start planning for your move. Not only are you going to want to start looking for a new home, but you’re going to want to start de-cluttering and packing. The earlier you start, the easier the move will be.

Pack smart. Begin with the items that you use the least and leave those things you use on a frequent basis for last. Don’t forget to clearly label all boxes and bins so that you know where everything is when you finally get to your new home.

Purge with a Purpose

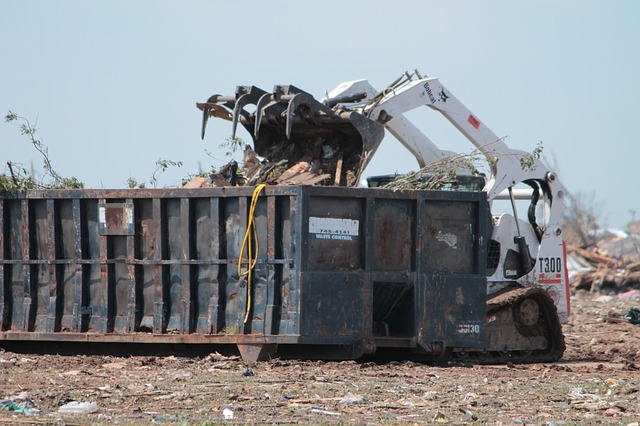
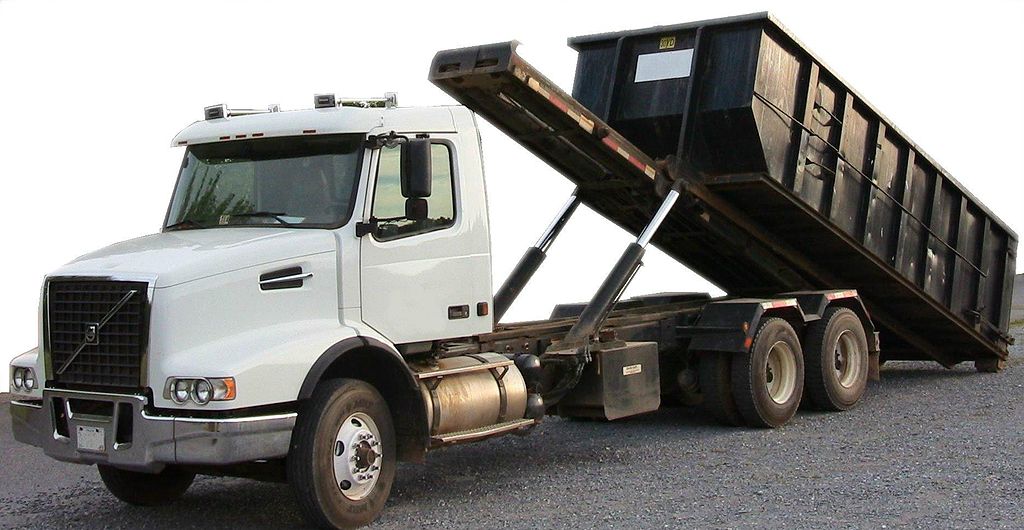
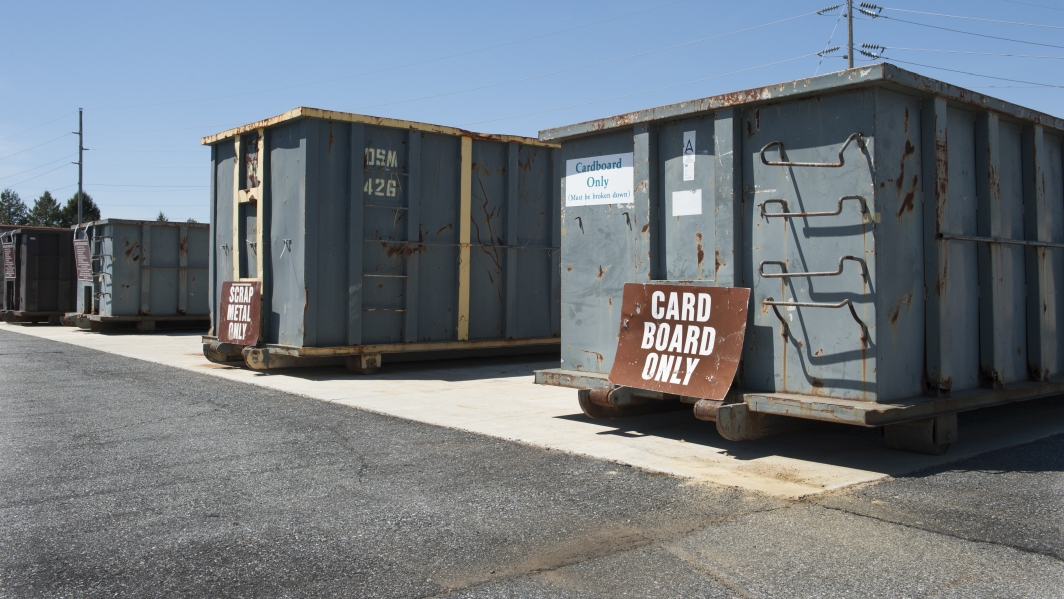
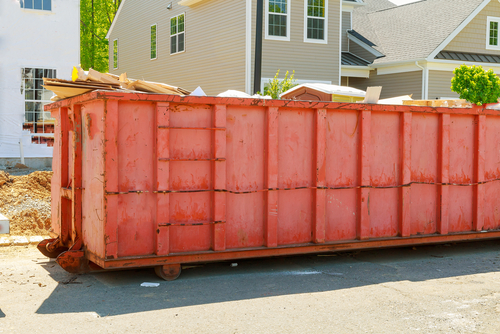
You’re probably going to end up purging a lot of “stuff”. Be smart about it. While you may not want particular things anymore, that doesn’t mean that they can’t be used by someone else. If they’re in good condition, sell them at a yard sale or donate them. If you do end up having a lot of trash stuff that just needs to be trash, consider renting a dumpster. It will be far more convenient than having to lug trash bags up to your curb, and you won’t have to wait for your waste management company to pick them up. The best part about renting a dumpster is that when you’ve filled it up, all you have to do is let the company know and they’ll take the trash off your hands. Talk about easy!

Set Limits in Your New Place

Just like you probably accumulate a lot of clutter in your current home, you’ll probably end up accumulating a lot of clutter in your new space, too. No matter how big your home is, too much clutter is never a good thing; however when the square footage is smaller, you’ll really need to keep the accumulation of “stuff” under wraps.

Establish clutter limits in your new place. Decide how long you should keep paperwork before shredding it, or consider donating one article of clothing for every new garment you purchase. By taming the number of things you accumulate, you can prevent your new, smaller home from becoming even smaller.

Downsizing can be a large and overwhelming task. By following these tips, you can ensure it goes as smoothly as possible so that you can really enjoy this new and exciting chapter in your life.

Top Bathroom Remodeling Trends for 2018

While you’re cooped up in the middle of winter, you’ve probably started to really notice how much the inside of your house needs to be updated. If your bathroom looks lackluster, is outdated, or it just isn’t the welcoming space that you want it to be, now is a perfect time to do a remodel!

If you’re going to invest in a bathroom remodel, you want to make sure that redesign will suit your specific needs. However, you might also want to incorporate some of the latest trends to ensure that the space fits in with the times. And, by including some of the latest design trends, you can add real value to your home. There have been some incredible advances in bathroom design over the years, and this year is no different. What are some of the biggest trends of 2018? Here’s a look at some design ideas that you should consider incorporating into your remodel if you really want to make the most of your bathroom remodel.

Monochromatic Color Schemes

If finding a color that you love for your bathroom seems like a difficult task, then you’re going to love this design trend: monochromatic color schemes. In 2018, monochrome bathrooms are in style in a huge way. It makes for a clean look, and it’s so easy to decorate with and update when you want to make some simple changes down the road.

Choosing a monochromatic color scheme is simple: pick a standout color that you love and accent it with lighter and darker hues of the same color. For example, a darker gray could be your focal color and lighter grays, whites, and even light silver could work as accents. Feature your focal color in major elements, such as the tub, the vanity, or the main color in your tiles. Add in the accent colors in the rest of the elements. To pull it all together, you can add some pops of color with your linens, shower curtain, and area rug.

High-Tech Toilets

Technology has touched virtually every facet of life, including the bathroom. Toilets have become super high-tech, and they are a big trend being used in bathroom remodels this year.

What type of features do high-tech toilets offer? Things like seat warmers, lids that automatically open or slowly close, and even built-in deodorizers (so your bathroom always smells fresh and clean!) The most state-of-the-art toilets are even outfitted with wireless music players that turn on as soon as the lid is opened. Imagine being able to use the loo while some soothing background music is playing? Talk about forward-thinking!

Radiant Heating

Say goodbye to stepping out of a hot shower and onto a frigid floor! Thanks to radiant heating, you won’t have to worry about cold toes anymore!

Radiant heating involves placing coils on top of the subfloor, and either hot water or electricity heats them, thus heating the flooring material that you place over them. You can use radiant heating with any type of flooring, including tile, vinyl, concrete, and even stone. And, not only do these heating systems keep your floor warm but because heat rises, they also effectively heat the entire space. Plus, you won’t have to worry about the dust and dirt that traditional baseboard heating or radiators push out. Talk about a great investment!

Interesting Tile Shapes

When it comes to tiles, traditional shapes are still in (think subway tiles); however, if you really want to go for an updated, avant-garde look, opt for tiles that feature interesting shapes. Tiles of different shapes and sizes used to be all the rage decades ago (think the 1920s when Art Deco was en vogue). These unique shapes eventually moved out of fashion and were replaced by standard squares or rectangles; but in 2018, they are back in a big way! There are tons of options to choose from, such as diamonds, hexagons, and even fish scales!

If you really want to make a bold statement, feature these unique shapes in just one area, such as the backsplash, and use standard shapes elsewhere. You’ll create a bold, eye-catching look that is totally in the “now”.

Appliances

In 2018, the kitchen isn’t the only space where appliances are being used; they are also making their way into the bathroom! Today, high-end bathrooms feature a range of appliances. For example, you can include a built-in mini-fridge to hold beverages, medications, or even or organic skin treatments. Warming drawers are another great option. You can use them to keep your towels, robes, and clothing warm. If you don’t like the idea of having to constantly change out hand towels, you might want to install an automatic hand dryer. You don’t have to go with an austere design; there are tons of automatic hand dryer styles available, so you can avoid having your bathroom look like a public restroom.

Storage, Storage, Storage!

Makeup, linens, medications, toiletries; there are so many items that are used in the bathroom. This year is all about convenience, and including ample storage space in your bathroom will ensure that all of those must-have items are easy to access when you need them.

Vanities have always been used for storage; however, today, there are so many different choices, including drawers of various shapes and sizes, and built-in organizers and shelves in the cabinets. Look to add storage elements in unexpected and otherwise unused spaces, too. For example, you can have a customized shelf with drawers and cabinets built to fit around the toilet! Their options are limitless!

By incorporating these design ideas, your bathroom will easily become your favorite room in the house. Whether you’re doing the remodel yourself or you’re hiring a professional, don’t forget to rent a dumpster before you start your project! You’ll have a convenient space to toss out all of that debris! The best part is that when the project is done, all you have to do is contact the dumpster rental company and they’ll haul it away for you!

Most Common Home Renovation Mistakes

Whether your growing family needs more room in the house, or you want to breathe some new life into your stale, outdated kitchen, a home renovation can be extremely exciting. It presents so many wonderful opportunities to put your personal stamp on your house, and the end result will make you love your home even more. However, it takes proper planning, time, and patience to reap the rewards that a renovation can offer.

Even if it’s a minor remodel, you want to make sure that you are prepared. Unfortunately, many homeowners make some pretty big mistakes when they are renovating; mistakes that can make the process a lot harder, longer, and much more expensive. If you want to ensure your renovation is a success, make sure you avoid these seven common mistakes.

Not Having a Solid Plan

Of course, you’re going to have an idea of what it is that you want to achieve with your renovation; however, many homeowners make the mistake of not creating a solid plan. When it comes to renovations, things can definitely change at the drop of the hat, so being flexible is important. However, you definitely want to make sure that you establish a plan of action before you get started.

Determine what it is that you want to achieve, what look you are going for, your budget, a time frame… If you don’t have a real plan, things will likely get out of control very quickly and completely derail your project.

Using Cheap Materials

The old saying “you get what you pay for” is one that definitely applies to home renovations. A cheap price tag is usually a good indicator of the quality of the tools and materials. For example, while you might save yourself a few bucks by going for cheaper plumbing materials, in the long run, you’ll end up spending more. Why? – Because the lifespan of those cheap materials is much shorter than more expensive, higher quality items. Imagine having to tear down your walls, replace your vanity, or install new fixtures a year or two after you complete your renovation? Not only will you have to spend more of your hard-earned money to replace them, but you’ll also have to deal with the hassle of more work!

Not Sticking to a Budget

While you definitely don’t want to use cheap materials, you also don’t want to blow your budget. Unless your financial resources are unlimited, establish your budget before you get started. Make estimates for all renovation-related costs, even the little things, like light bulbs, spackle, and paintbrushes. Determine what materials are an absolute must, and what items aren’t necessary, but would be nice to have.

If you find that your estimates are more than you can comfortably afford to spend, you might want to consider pushing the remodel off until you can save enough to get the results you want. You want to be happy with the outcome, not end up hating it or wishing that you could make changes right away.

Not Putting Safety First

Those safety goggles might seem “dorky”, but do yourself a favor and make sure you put them on. Should a piece of wood or a renegade nail go flying toward your eye, you’ll be glad you had the protection.

Make sure you take the time to ensure your job site is safe. Check for power lines before you start knocking down walls, make sure that cords are taped down, turn off the main water source before playing with plumbing, have someone spot you while you’re climbing a ladder, etc. A lot of homeowners think that they will use caution and avoid getting hurt, but then end up sustaining an injury that lands them in the emergency room – an injury that could have been avoided had they simply taken the time ensure their safety.

Not Prepping Before Starting

You want to get your renovation done as quickly as possible, so you decide to skip out on the prep work. While it might shave a few minutes off of your timetable now, not prepping could actually add more time to your project. For example, you might think that drop cloths or taping are unnecessary before you paint because you have a steady hand and you’re going to be super cautious; however, even if you have the steadiest hands and you think you have wiped off all the excess paint to avoid drips, guess what? – You can still make mistakes! Trying to get paint out of a carpet (if you’re going to keep your existing carpet) or repainting your ceiling because your paintbrush slipped while you were edging will definitely add time – and money – to your renovation.

Not Being Prepared for the Chaos

A renovation can put a real damper on your life until it’s complete. For instance, if you’re renovating your bathroom, you’re going to want to make sure you have a designated place to get ready, or if you are remodeling your kitchen, you want to ensure that you know how you are going to feed your family.

A lot of homeowners don’t anticipate the upheaval that comes along with a renovation. Then suddenly, they realize that they don’t have anywhere to cook food and quickly grow tired of ordering out every night. Make sure you’re ready to deal with the disorder so you can get through your renovation with your sanity in-tact.

Not Renting a Roll-Off Dumpster

Here’s a little secret for you: home renovations create a lot of trash. From sheetrock to old tiles and everything in between, there’s going to be a lot of garbage to get rid of. Sure, you could just pile it all up on the curb, but do you really want to deal with that eyesore? And, what happens if your town’s waste management won’t take all of that trash?

Save yourself a headache and rent a dumpster! You’ll have convenient spot to throw out all of that waste, and the best part is this: You just have to call the dumpster rental company and they’ll unload it for you! Talk about a win-win!

4 Tips for Dumpster Rental Success for Homeowners

Unless you’re a professional contractor, chances are that you don’t have much experience with renting a dumpster. However, a dumpster rental is useful for more than just construction professionals; it can be very handy for homeowners, too.

From home renovation projects to cleaning up yard waste, renting a dumpster can make your project go a lot smoother. Knowing how to rent a dumpster can ensure that your project goes as smoothly as possible.

You might be thinking to yourself: “How hard can renting a container be?” It’s actually not very complicated, but there are definitely some things that you should know that will make the process a whole lot more efficient.

Here are five handy tips that will make your experience with renting a dumpster a success.

Figure out What Size You Need

The first thing you are going to want to do is figure out what size dumpster you need. Sure, you could call and rent any container, but what happens if you get one that is too small for your project, or you end up spending more money on a larger dumpster than you actually need? One of the most common mistakes people make when ordering a container is choosing the wrong size.

How can you tell what size you need? Here’s a general guideline:

  • 10 yard dumpster. This size is great for smaller remodeling projects, such as a small bathroom or kitchen renovation or the cleanout of a medium-sized attic or basement. You can fit 10 cubic yards of waste in a 10 yard dumpster, which is around the same amount that the flatbed of three pickup trucks can hold.
  • 20 yard dumpster. This dumpster can accommodate 20 cubic yards of waste, or the equivalent to six flatbeds of a truck. If you’re embarking on a medium-sized renovation or a bigger cleanup, such as the removal of a large deck or the carpet from large home, this size container will likely suit your needs.
  • 30 yard dumpster. This is a good size for a major project, like a new addition to your home or the construction of a new building. You’ll be able to fit 30 cubic yards of waste in a 30 yard dumpster, or about nine flatbeds full of debris.
  • 40 yard dumpster. This size is usually reserved for commercial projects; however, if you are going to be replacing all of the windows in your home or you are removing the siding, this could be the right option for you. You’ll be able to unload 40 cubic yards of waste in a container of this size, which is around the same amount that 12 pickup flatbeds can hold.

Know What Type of Debris You are Getting Rid Of

You also want to make sure you know what type of waste you are going to be disposing of. A lot of dumpster rental providers have limitations on the type of materials they will accept. For example, you might not be able to mix certain materials together, such as gravel and yard waste. Some companies simply follow the waste disposal rules that are set forth by the town; for instance, dangerous items, such as antifreeze, solvents, and pesticides, aren’t allowed to be placed in any type of dumpster.

Find Out About Drop Offs and Pickups

The entire point of renting a dumpster is to make your project easier. If the dumpster rental company you are considering can’t drop off or pick up the container within a timeframe that works for you, working with that company probably isn’t in your best interest. Make sure you find out about schedules, including drop off and pickup times. Also, ask what you need to do to let the company know that your container is ready to be removed from your property. You want to make sure that the process is as convenient for you as possible.

Choose a Good Location

While speaking of convenience, make sure you choose a location that works best for you – and for the dumpster rental company. In other words, you want the dumpster to be located within close proximity to your project so you don’t end up having to lug heavy material a far distance. You also want to ensure that the location you choose is easy for the company to access. It shouldn’t be blocked by any trees, shrubs, bushes, cars, or any other items that could prevent a smooth delivery and pickup.

By keeping these tips in mind, you can ensure that your dumpster rental experience – and your entire project – will be efficient and effective. If you have questions or you aren’t sure about something, don’t be afraid to ask! Our friendly representatives will be more than happy to help you find the right dumpster to suit your specific needs.

3 Tips for Dumpster Rental Success

If you are about to embark on a job that involves getting rid of debris, before you get started, the first thing you’re going to want to do is rent a dumpster.

A dumpster rental can make your project go a whole lot smoother. It provides you with a definite space to get rid of your waste and debris, and it’s super convenient. You won’t have to contend with a huge pile of rubbish sitting on your front lawn as you wait for your waste removal company to pick them up. Once the dumpster is full, all you have to do is call the company you rented it from and they will take it off your hands.

However, while renting a dumpster is certainly beneficial, there are some things that you want to keep in mind before you just order one haphazardly. In order to ensure that your dumpster rental experience is as efficient and successful as possible, make sure you consider the following information.

Assess Your Needs

Before you rent a dumpster, the first thing you want to do is determine your specific needs. Dumpsters come in a variety of sizes, so you want to make sure that you choose one that can accommodate whatever it is that you are trashing. There are so many reasons why people rent dumpsters, but some examples include:

  • You are going to embark on a landscaping project that involves removing shrubs, trees, or even patios or fencing.
  • You are a contractor or a homeowner who is planning on doing a renovation, such as a bathroom remodel or finishing a basement, and need a way to dispose of all the waste materials.
  • You want to clear out the contents of an attic, a basement, or even an entire house.
  • You will be renovating a foreclosed property so that you can either sell it for a profit or live in it.
  • You have amassed a large number of bricks, concrete, or other items that your garbage removal company won’t collect.

All of the above are ideal situations for a dumpster rental. However, while they all involve getting rid of waste, they are slightly different in that they all involve different types of refuse. Junk removal companies follow different rules and regulations regarding what they will and will not allow to be placed in their dumpsters. Some companies simply follow local laws, while others set their own restrictions regarding the type of materials they will accept. For that reason, it is important that you check with the company you are thinking about renting a dumpster from to ensure that they will accept the items you need to dispose of.

Determine What Size You Need

Once you figure out what it is that you will be tossing and which dumpster rental company will accept your items, the next thing you need to do is figure out what size container you need. Dumpsters come in various sizes. Here’s a guide to help you determine what size is right for your needs:

  • 10 yards. A container of this size can accommodate up to 10 cubic yards of waste. Typically, they are 12 feet long by 8 feet wide and are 4 feet high. This size is would work well for a project that involves cleaning out waste from a garage or a small attic or basement, debris from a yard, or a small bathroom or kitchen renovation.
  • 20 yards. This sized dumpster will hold up to 20 cubic yards of material and typically measures 22 feet long by 8 feet wide, and 4.5 feet high. This is an ideal size for the clean out of a larger attic or basement, the removal of carpeting in a large home, or the shingles from a large roof.
  • 30 yards. With this container, you will have 30 cubic yards of space for your debris. It usually measures 22 feet long by 8 feet high and is 6 feet high. This size would be suitable for a major home renovation, the construction of a new home, or the demolition of an outdoor structure, such as a detached garage.
  • 40 yards. This size dumpster can hold up to 40 cubic yards of waste. The measurements are typically 22 feet long by 8 feet wide, and the height is usually 8 feet. The removal of siding or windows from a large sized home or the roofing from a commercial building are projects that a container of this size would be suitable for.

When it comes to renting a dumpster, try to avoid choosing a size that is much bigger than what you actually need. Many people assume that it’s better to have more space, just in case; however, if your project only requires a 20-yard dumpster and you rent one that’s 40 yards, you’ll be paying for much more space than you actually need. If you aren’t sure what size container is best for you, ask the company you are considering. They can guide you in the right direction.

Ensure Accessibility

Lastly, you want to make sure that you have space where the dumpster can easily be accessed. Ensure that the location you plan on having the dumpster situated is close enough to the area where you will be working. If it’s too far away, you’ll have to deal with lugging the materials a far distance. Additionally, you want to make sure that the area is unobstructed so that the rental company can easily drop off and pick up the container.

Choosing the Best Dumpster Rental for You

When it comes to renting a dumpster, there are a lot of options available. By taking the above into consideration, you can choose the best option for your needs and ensure that renting a dumpster will go as smoothly as possible.

Moving? Use These Tips to Keep Your Sanity!

red dumpster for rentWhile moving can be extremely exciting, it can also be very daunting. The idea of having to go through everything you own, boxing it all up, transporting it, and setting it all up isn’t exactly thrilling; in fact, it can be quite overwhelming.

To make the moving process easier and more efficient while keeping your sanity intact, here are some handy tips to keep in mind.

Purge!

Before you even think about packing up a single item, do a major purging. The more items you get rid of, the less you have to pack, move, and unload in your new space. Go through every area in your house, including the attic, the basement, the garage, closets, drawers, etc.

It might be tough, but try to let go of emotional ties. The pan you were given as a housewarming gift when you moved into your current home but chars all your food? – Trash it! That dress your mom gave you for your birthday a few years ago and still has the tags on it? – Donate it!

Downsizing the amount of stuff you have will make the entire moving process a whole lot easier. Plus, you’ll start off with more of a clean slate in your new digs.

Get Your Supplies

Once you’ve cleared out clutter, start collecting your supplies. You’re going to need boxes and lots of them. You can buy boxes, or you can collect them from grocery stores, retailers and other establishments that have their shipments delivered in boxes. You’ll also want to make sure you have plenty of newspaper and bubble wrap, packing tape, and markers.

Making sure you have necessary supplies before you start packing will help you avoid having to stop to get more supplies when you’re in the midst of your packing groove.

Take it Room-by-Room

Instead of focusing on everything all at once, work on one space at a time. For example, focus only on packing up the bedroom and don’t even think about any other space until that room is done. Once you have your bedroom packed up, move onto the next space and continue the process until every room is packed.

An important note: start with rooms that are used the least often; the dining room, for example. This way, you can avoid unpacking things that have already been packed up.

Label, Label, Label

When it comes to moving, labeling is your best friend. You can use a marker and print out the contents of each box right on the side, or you can print out the contents of every box on self-adhesive labels and slap them on the top or sides. Also, don’t forget to clearly label where each box should go in your new abode.

Labeling will make the unpacking process so much smoother. It will also help you avoid tearing through every box to find your sheets when all you want to do is make your bed and catch some Zs at the end of moving day.

Call in Helping Hands

There’s going to be a lot on your plate when you’re in the middle of a move. The packing alone can be a long and exhausting process; not to mention actually hauling everything from one space to another.

Ask your friends or family members to help out! Reward them with tasty snacks and beverages. You might even want to consider giving them gift cards or some other token to show your appreciation. Make the packing and moving process fun by playing lively music and just getting silly! Things will go a lot faster and you might make some great memories, too!

If going the friend and family route isn’t an option, consider hiring a moving company. Professionals can help you with packing and transporting so you can have some of the weight of your move lifted off of your shoulders.

Save the Essentials for Last

Though you’re eventually going to have to move everything out of your current location, there are some things that you are going to need until moving day arrives. Toiletries, a coffee pot, some articles of clothing, pillows and a blanket, your laptop; these are examples of some of the items that you probably use every day and want to wait until the last minute to pack up.

Pack these essentials in clearly labeled boxes so that you know exactly where they are when you arrive at your new home and can access them right away.

Heavier Items = Smaller Boxes

dumpster house project
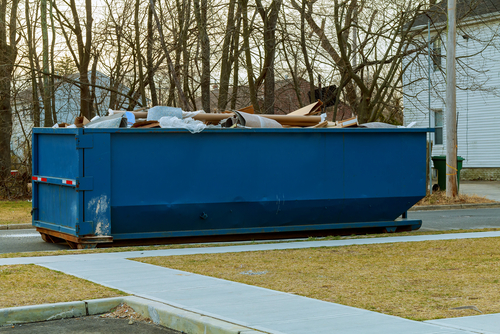
Pack those heavier items in smaller boxes. For example, if you have a ton of books, packing them in a large box might seem like the obvious choice; however, that’s a really bad idea. Books are heavy, especially in large numbers. The same is true for anything on the heavy side. If you’ve ever tried to lug a box full of textbooks out of a dorm room, you know exactly what we’re talking about.

Packing heavier items in smaller boxes will make them much easier to haul. Save the large boxes for lightweight items, like linens.

Start Early

The earlier you start, the better off you’ll be. In fact, we recommend you start packing as soon as you find out that you are moving. You’ll save yourself some major anxiety and ensure that everything is taken care of.

By following these tips, you can make your move a lot less stressful and much more successful. If you find that you have a lot of junk to purge, don’t forget to rent a dumpster! You’ll have a convenient space to toss out all of that junk so you can focus on packing.

Tips for Cleaning Out a Foreclosed Property

House Project with Dumpster RentalThough the real estate market has been experiencing an upswing in recent years and there has been a steady decline in the foreclosure rate, there are still active foreclosures taking place in every corner of the country.

While a foreclosure may not be a good thing for a homeowner, for a real estate professional, it can be a great investment. These properties are relatively inexpensive to purchase, and once they are fixed up, they can be sold for a hefty profit. However, before the refurbishing process can begin, the property has to be cleaned out. Cleaning out a foreclosed house can be a tough task. Often, these homes are in disrepair and need to be taken down to the bare bones. And, on top of that, many people leave a lot of junk behind, from furniture to appliances, and just plain old trash.

How can you tackle the big undertaking that is involved with cleaning out a foreclosed property? Here are some helpful tips to guide you.

Realize the Challenge

Unlocking the door of a foreclosed property can be quite overwhelming. It’s not uncommon to see tons of trash left behind, and even damage that the previous homeowners have caused. Broken windows, holes in walls, torn out light fixtures, graffiti; the mess can be quite alarming.

To avoid getting overwhelmed, it’s important to realize that you are more than likely going to be dealing with a huge undertaking. With that realization in mind, you can then start creating an effective plan of action to get the job done.

Assess the Property

First things first: you need to assess the property. Doing so will allow you to determine exactly what needs to be done. The structure itself may be in good condition, but you may have to remove a lot of rubbish that has been left behind. Or, the house may be in disrepair and you might have to pull up carpeting, tear down walls and replace windows.

Enlist Help

Even if you pride yourself on being a hard worker and don’t mind taking on a big task, when it comes to cleaning out a foreclosure, you’re definitely going to want to enlist some help. You could hire a crew, or you could ask trusted friends to help. The more hands you have on deck, the faster the job will go.

Gather Your Equipment

Once you know what needs be done, you want to get the equipment you need to get the job done. What type of tools do you need? That depends on the condition the property is in. If the house is in good shape, you might simply need standard tools you would find in any toolbox. However, if you need tear things down to the bare bones, you will probably need bigger construction equipment.

Whatever type of equipment you need, you definitely want to make sure that you rent a dumpster. No matter what condition the foreclosure is in, there’s no doubt that you are going to have a lot of trash to get rid of. Renting a dumpster will ensure that you have a convenient place to put all of that trash. You won’t have to worry about waiting to have the garbage picked up by a sanitation company, or have to deal with some items not being picked up; all you have to do is call the business you rented the dumpster from and they will haul it away for you.

Don’t Forget the Exterior

You’re probably going to focus a lot of your attention on the interior of the foreclosure, but don’t forget the outside. Cleaning up and repairing the exterior of the house will definitely improve the value of the property, as well as attract buyers, making for a quicker sale.

Just like the inside of the house, the condition of the exterior could vary. For example, it may require nothing more than updated landscaping and a coat of paint or the siding may need to be torn down and a new driveway may need to be laid. Remember that the exterior is the first thing prospective buyers will see. Make sure they have a positive impression by sprucing up the outside of the foreclosed property.

Make Sure Everything is Legit

Dumpster Rental on the Side of a House
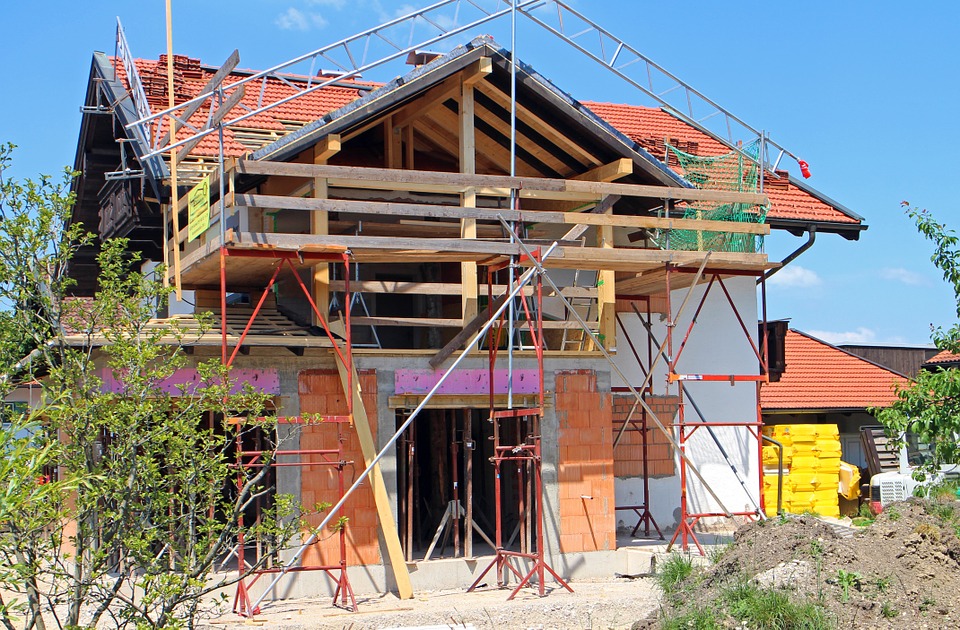
If you are planning on doing any upgrades to the property, make sure you check with the town to ensure your plans meet town ordinances. Depending on what your plans are, you may have to get certain permits, too. For instance, if you going to turn a basement into an apartment make sure that you are allowed to and that you do everything necessary to make the space legal. The last thing you want to do is make changes to the house, only to find out that you aren’t in compliance with rules and regulations. Not only could you get in trouble, but so could the future homeowners. Moreover, if you don’t ensure everything is legit, there’s a chance that you could get fined, or that prospective homeowners will walk away from a purchase.

List the Property

When the project is completed, it’s time to put the property up on the market. Call a reputable real estate company and speak with a realtor to find out how much you put the house on the market for. The agent will share great insight with you and will serve as an ally for selling your property at the highest rate possible.

A Clean Slate for 2018: Cleaning Tips for the New Year

Red Dumpster RentalA new year has arrived and the best way to start it off is with a fresh, clean slate. Now that the hustle and bustle of the holiday season is over, you are probably overwhelmed with all of the cleaning and organizing that needs to be done. The decorations need to be packed up and put away, the gifts need to find new homes, and there’s just so much “stuff” lying around. It seems like such a big job and you can’t help but wonder how you are going to tackle it.

First, take a deep breath, and then keep on reading for some handy tips that will help you get your home clean and tidy so you can start the New Year off with a fresh start.

Pack Up the Decorations

First things first: start with putting the decorations away. While they are certainly beautiful and bring so much joy, now that the holidays are over, they are collecting dust and you just want your house back to normal. Once the decorations are gone, you can really focus on cleaning and organizing the rest of your house.

But how do you clean up your holiday decorations? Here’s some advice:

  • Ornaments. Everyday items, such as egg cartons and plastic cups, are a great way to store fragile ornaments so they won’t roll around and break.
  • Lights. Tangled up lights are a pain. Wrap them around empty gift wrap tubes or strips of cardboard to avoid a headache when it’s time to put them up next year.
  • Wreaths. Put wreaths on hangers and hang them up in a closet, on nails in your attic, or on a rolling coat rack.
  • Gift bags and cards. Use file folders to store gift bags, tissue paper and cards so they won’t crinkle. Tuck them in a storage bin and store them away.
  • Gift wrap. Have extra rolls of gift wrap? Store them in a garment bag to avoid creasing and keep them fresh so that it doesn’t become a jumbled up mess.
  • The tree. If you have a real tree, lay it down on a tarp before you haul it out to prevent the needles from scattering everywhere.

The Gifts

Next up: cleaning up and putting away the gifts. Start by sorting through them and determine what you want to keep and get rid of. It’s the thought that counts, but the best intentions can add unnecessary and unwanted clutter to your home. Return or donate gifts that won’t be put to use. For the things you want to keep, decide where to store them. You’ll probably have to get rid of some old stuff to make room for the new. This is the perfect opportunity to clear out old clothing, shoes, toys, etc. Donate old items that are in good condition. Contact local charities to find out if they are taking donations. Most will gladly accept anything that you are willing to give. For items that are in disrepair or simply can’t be used anymore, don’t be afraid to toss them out.

Get to Cleaning

Once all of the decorations are taken down and stored away and the gifts have a new home, it’s time to roll up your sleeves and get cleaning. Here are some tips to get you started on the task:

  • Make a plan. Decide what room you want to start with. Trying to tackle everything all at once will be overwhelming. By focusing on one room at a time, you’ll be able to do a much more efficient job – and you won’t be as frazzled. Start with the kitchen or the living room, for example. Once you finish one space, you can move on to the next.
  • Gather your supplies. Cleaning is a whole lot easier if you have everything you need before you get started. Some items you’ll probably want to have on hand include:
    • Broom and dustpan
    • Vacuum
    • Mop
    • Dusters
    • Cleaning sprays
    • Rags
    • Paper towels
    • Sponges
    • Trash bags
  • Top-to-bottom. Start at the top and work your way down to the bottom. In other words, clean high spaces first and move down, saving the floors for last. As you clean, any dust, dirt or debris from high spaces that fall down can be swept, vacuumed or mopped away so that all surfaces are left clean.
  • Move furniture. To get a really good clean, don’t forget to move furniture. You’ll be amazed by what gets trapped underneath couches, tables, shelves and other furnishings; gift wrap, bows, and dust bunnies, for example. You might even find things some things that you thought were lost forever!

Blue Dumpster RentalCleaning and organizing will get your home in order so that you can have a happier and more productive year. If the job is really big, consider renting a dumpster. You’ll have a convenient place to trash all of those unwanted items, and you won’t have to worry about having a big mess in your front yard until your refuse company hauls them away. We have a wide assortment of dumpsters in varying sizes and will gladly help you find the best option for your needs. The best part about renting a dumpster? – When you’re all done, you don’t have to worry about taking out the trash! Just give us a call and we’ll take the dumpster – and your trash – off your hands!

To learn more about our dumpster rental options or to schedule a delivery, give us a call today! Happy New Year!

Your Guide to Renting a Dumpster

Maybe you’ve decided to purge all of the junk that has accumulated in your basement over the years. Perhaps you are moving and want to clear out some stuff before you start packing. Maybe you’re going to embark on a major renovation project in your office and you need a place to trash all of the construction debris. Whatever the case may be, renting a dumpster from a quality junk removal company is an excellent option for you. Not only does it give you a place to store debris, but it’s also super convenient. Once the dumpster is full, a quick phone call to the junk removal service is all you need to do to have the dumpster (and all that junk) hauled away.

While renting a dumpster is pretty simple, there are a few things that you want to keep in mind before you order one to make the process as easy, efficient and affordable as possible.

house project with dumpster in the front

Make a Plan
Just like most things in life, successfully renting a dumpster starts with a plan. You might be asking yourself, “Do I really need a plan for clearing out trash and tossing it into a dumpster?” If you want to avoid potential problems, a plan is a must.

Here are some tips to help you create a plan for your junk removal project and dumpster rental:

  • Choose a Date. First things first: set a date. Whether its spring cleaning or a home renovation, make sure you choose a date. You’ll need to let the dumpster rental company know when to deliver your container; plus, knowing when you’re going to get started will ensure you’re prepared to get started and don’t push the project off.
  • Pick a Location. You’ll also want to pick a spot to have your dumpster placed. It will make things a lot easier for you – and the junk removal company – if you choose a spot beforehand. Consider the proximity to your project; the closer, the better. Also, contact your town or your HOA to find out if there are any rules that need to be followed. You may not be permitted to have a dumpster placed directly on your front lawn, for example.
  • Know What You’re Tossing. Some things can’t be placed in a dumpster, such as hazardous and flammable debris. Some things can’t be mixed together in a dumpster. Figure out what type of items you plan on placing in the receptacle so you can avoid pitfalls once your project is underway.

Consider the Size

You definitely don’t want a dumpster that is too small, but you don’t want one that’s too big, either. Obviously, if it’s not big enough, it won’t hold all your trash; however, if it’s too big, you’ll end up paying for space you don’t need.

dumpster at the side of family home

Dumpsters are measured in cubic yards; usually 10, 20, 30 and 40.

  • 10 Yard Dumpster This size is suitable for smaller projects, such as cleaning out a basement, cleaning up a yard, or renovating a small bathroom.
  • 20 Yard Dumpster This size is recommended for medium-sized projects, like clearing out a large attic or removing carpeting from a house.
  • 30 Yard Dumpster This is a good size for replacing roof shingles on a small- or medium-sized house, pulling up a large deck, or clearing out junk from a house.
  • 40 Yard Dumpster If you’re replacing all of the windows on your house or adding a large new addition to your home, this dumpster size should be suitable.

If you aren’t sure, ask the dumpster rental company for advice. They will be able to help you choose the right sized dumpster for your project.

Find a Reputable Dumpster Rental Company

There are a lot of junk removal companies that offer dumpster rental services. Unfortunately, many of them don’t have a great reputation. The last thing you want is to get ripped off or end up being stranded with a full dumpster on your property.

The following will help you find a junk removal company you can rely on:

  • Ask friends and family for recommendations
  • Do some research to find out about the company’s reputation
  • Ask questions, like how much they charge, what their process is like, and whether or not they are insured
  • Pay the company a visit and check out the quality of their containers

Get Ready for Delivery

After you have done all of your planning and made arrangements with a dumpster rental company, it’s time to get ready for the delivery. Check the area where you plan on having the dumpster placed. Make sure that it is clear of anything that could obstruct the container or the truck that will be delivering it, such as debris and vehicles. The location should be easy for the company to access so that the delivery of your container can go off without a hitch.

dumpster house project

Call for Removal

When you have finished your project and your dumpster is filled, don’t forget to call the company you rented it from to arrange for a pickup. Discuss the date with the junk removal service to make sure that it suits your needs and there’s. And, before they arrive to remove your container, check to make sure that they can get to it without any problems.

If you need to rent a dumpster, or you need help with junk removal, drop us a line or give us a call! We can accommodate all of your needs and will be more than happy to assist you!